Hydraulic hose connectors are critical components in many industrial machines and systems. They facilitate the smooth and efficient operation of hydraulic systems by ensuring proper fluid flow. However, one common issue that many operators face is hydraulic hose connector leaks. These leaks can result in costly downtime, damaged equipment, and even environmental hazards. Preventing hydraulic hose connector leaks requires a well-planned strategy involving proper selection, installation, and maintenance. In this guide, we’ll walk you through the three simple steps to prevent hydraulic hose connector leaks.
Table of Contents
Introduction

Hydraulic hose connectors are the unsung heroes of hydraulic systems. These connectors ensure the secure and leak-free transfer of hydraulic fluid between different parts of machinery. However, leaks can occur when connectors are not properly selected, installed, or maintained. Leaking connectors not only result in system inefficiencies but also increase the risk of equipment failure and downtime. The good news is that preventing these leaks is entirely possible with the right approach.
In this blog, we’ll explore how to prevent hydraulic hose connector leaks by focusing on three simple yet crucial steps: selecting the right connector, proper installation, and regular maintenance. These actions, when implemented correctly, can significantly reduce the risk of leaks and enhance the performance of your machinery.
Step 1: Selecting the Right Hydraulic Hose Connector for Your Equipment
The first step in preventing hydraulic hose connector leaks is selecting the right connector for your equipment. Not all hydraulic connectors are created equal. The material, size, and type of connector you choose can all affect how well it performs under pressure and in harsh conditions. Here’s how to make the right selection:
Choose the Right Material for the Environment
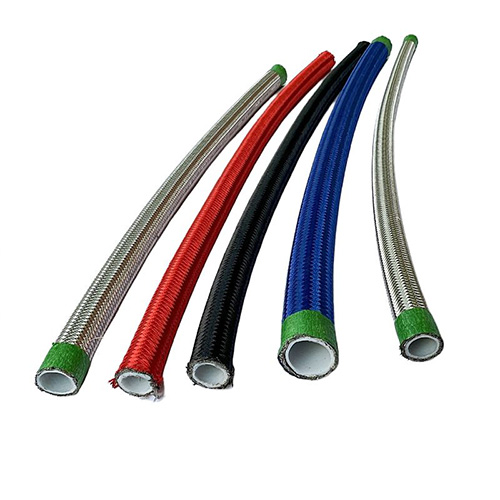
Hydraulic hose connectors come in various materials, each offering different levels of strength, durability, and corrosion resistance. Common materials include:
- Steel: Strong and durable, but may corrode in certain environments. Ideal for applications where strength is paramount.
- Stainless Steel: Corrosion-resistant, making it ideal for use in wet or chemically aggressive environments.
- Brass: A good choice for low-pressure systems and environments where corrosion is not a significant concern.
Ensure Proper Size and Pressure Rating
The size of the hydraulic hose connector and its pressure rating must match the requirements of your system. A connector that is too small or too large for the system can lead to leaks, pressure drops, or even system failure. Here are some things to consider:
- Diameter: Ensure the connector’s diameter matches the hose and port size.
- Pressure Rating: Choose connectors with pressure ratings that exceed the maximum working pressure of your system to account for pressure spikes.
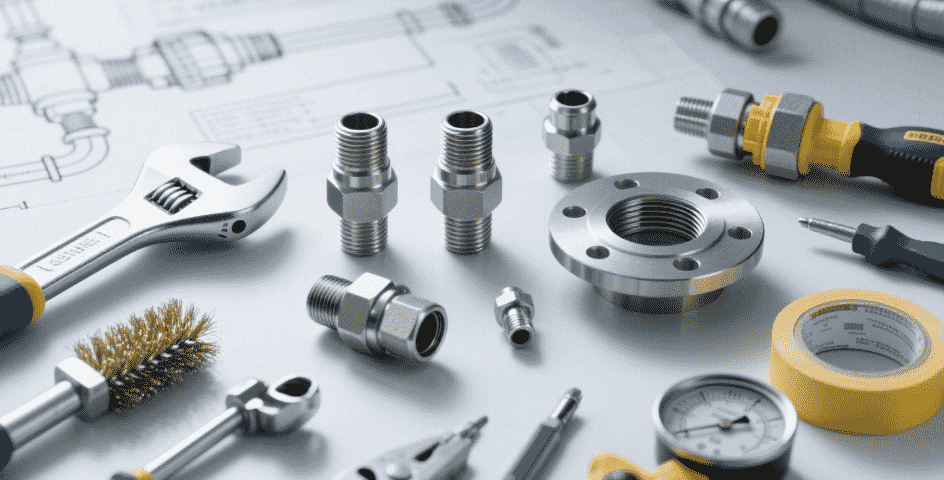
Consider the Type of Connector
Different types of hydraulic hose connectors, such as push-on, crimp, and bite-type connectors, offer varying advantages. It’s important to choose the right type based on the system’s operating conditions. For example:
- Push-on connectors are easy to install but may not be suitable for high-pressure systems.
- Crimp connectors offer strong, secure connections for systems requiring high pressure.
- Bite-type connectors work well for applications where vibration is a concern.
Selecting the right hydraulic hose connector ensures that your system operates efficiently and reduces the likelihood of leaks.
Step 2: Proper Installation of Hydraulic Hose Connectors

The next step in preventing hydraulic hose connector leaks is ensuring proper installation. Improper installation is one of the leading causes of leaks. Here are some critical installation practices to follow:
Ensure Tight Connections Without Over-Tightening
When installing hydraulic hose connectors, it’s important to ensure the connections are tight but not over-tightened. Over-tightening can damage the connector and lead to future leaks. Use the recommended torque settings for each type of connector. If unsure, refer to the manufacturer’s guidelines.
Check for Alignment and Proper Engagement
Before securing the connector, check that all parts are properly aligned. Misalignment between the hose, connector, and port can cause uneven pressure distribution and lead to leaks. Make sure the connector fits snugly into the port without any gaps.
Use Thread Sealant When Necessary
For certain types of connectors, a thread sealant may be necessary to ensure a leak-free connection. Thread sealants prevent fluid leakage around the threads of the connector and are especially useful in high-pressure applications. Ensure that the correct sealant is used and applied evenly.
Use Clean and Lubricated Parts
Ensure that the connector and hose are clean before installation. Dirt or debris inside the connector can damage the sealing surface and cause leaks. Additionally, lightly lubricating the connector’s threads can help ensure a smoother installation and prevent damage to the seal.
Step 3: Regular Maintenance to Prevent Hydraulic Hose Connector Failures

Preventing hydraulic hose connector leaks is not a one-time task. Regular maintenance is essential to ensure that connectors continue to perform optimally. Here’s how to maintain your hydraulic hose connectors:
Regular Inspection of Connectors
A regular inspection schedule should be followed to check for any signs of wear, corrosion, or leakage. Look for the following during your inspections:
- Cracks or wear marks: These can be signs of stress or pressure fluctuations.
- Loose connections: Check for any looseness in the connector fittings.
- Signs of corrosion: If your connectors are exposed to moisture or chemicals, inspect them for rust or corrosion, especially for steel or brass connectors.
Pressure Testing
Conduct regular pressure testing to identify potential issues before they cause failures. Pressure testing involves applying a known pressure to the system and monitoring it for leaks. This allows you to catch small issues early, before they escalate into major problems.
Replace Worn or Damaged Connectors
If any connectors show signs of damage, replace them immediately. Continuing to use worn connectors can result in leaks, which can compromise system performance and safety. Always use high-quality replacement connectors that meet the specifications of your system.
Hydraulic Hose Connector Maintenance Table
| Maintenance Task | Frequency | Best Practice |
|---|---|---|
| Inspect connectors for wear | Monthly | Check for cracks, wear marks, or corrosion. |
| Perform pressure testing | Quarterly | Apply system pressure to check for leaks. |
| Lubricate connectors | Annually | Use manufacturer-approved lubricants. |
| Replace worn connectors | As needed | Replace any connector showing signs of damage. |
| Clean connectors before use | Per use | Prevent dirt and debris from affecting seals. |
Conclusion
Preventing hydraulic hose connector leaks is essential for maintaining the efficiency and safety of your hydraulic systems. By selecting the right hydraulic hose connectors, ensuring proper installation, and conducting regular maintenance, you can significantly reduce the risk of leaks and system failures. While it requires attention to detail and diligence, these three simple steps will help extend the lifespan of your connectors and keep your machinery running smoothly.
FAQ
Q1: How can I tell if my hydraulic hose connector is leaking?
You can identify leaks by visual inspection, feeling for fluid around the connector, or using pressure testing equipment to monitor for drops in pressure.
Q2: What is the best material for hydraulic hose connectors?
The best material depends on your system’s needs. Stainless steel is ideal for corrosion resistance, while carbon steel offers strength for high-pressure applications.
Q3: Can over-tightening a hydraulic hose connector cause a leak?
Yes, over-tightening can damage the connector, leading to seal failure and eventual leaks. Always follow manufacturer guidelines for torque settings.
Q4: How often should I inspect my hydraulic hose connectors?
You should inspect connectors at least once a month for wear and tear, and more frequently if the equipment is in a high-stress environment.
Q5: What are the common causes of hydraulic hose connector leaks?
Hydraulic hose connector leaks can be caused by various factors, including worn-out seals, incorrect installation, damaged threads, or improper tightening. Over time, exposure to extreme pressure or temperature fluctuations can also degrade connectors.
Q6: How can I prevent corrosion on hydraulic hose connectors?
To prevent corrosion, ensure that connectors are made from corrosion-resistant materials like stainless steel. Regularly inspect for signs of rust or wear and consider using anti-corrosion coatings. Additionally, ensure proper sealing to avoid moisture buildup.
Q7: Can I use quick disconnect connectors to prevent leaks?
Yes, quick disconnect connectors can help prevent leaks during maintenance or when connecting/disconnecting hydraulic systems. These connectors are designed to provide secure connections and easy release without causing spills or leaks.
Q8: Should I replace hydraulic hose connectors after a leak?
It’s important to inspect connectors after a leak. If the connector is visibly damaged or shows signs of wear, it should be replaced immediately. If the leak was caused by a poor installation, you may only need to fix the installation and test the system.
Q9: What is the role of O-rings in preventing hydraulic hose connector leaks?
O-rings play a crucial role in sealing the connection between the hose and the connector. Over time, O-rings can wear out, leading to leaks. Regular inspections and replacing worn-out O-rings will help prevent hydraulic hose connector leaks.
Q10: How can vibration affect hydraulic hose connector performance?
Vibration can cause connectors to loosen over time, leading to potential leaks. To prevent this, ensure that connectors are properly torqued during installation and use anti-vibration measures, such as locknuts or vibration-damping materials.